I’m not a naturally organized person. In July before my first year of teaching, I remember being at the office supply store in the file/tray/organizer aisle, picking up a single black tray and thinking, “Hmm … this should do it.”
Needless to say my first year was a mess both literally and figuratively. Like a lot of things in teaching, I learned how to be organized by trial and error.
Lots and lots and lots of error.
To save you some error, here are my top five organizational tricks!
1) The BGT
The BGT in my class stands for Big Gray Thing because I don’t know what else to call this beautiful specimen. A friend donated it to me. I believe normal people call them mail sorters.
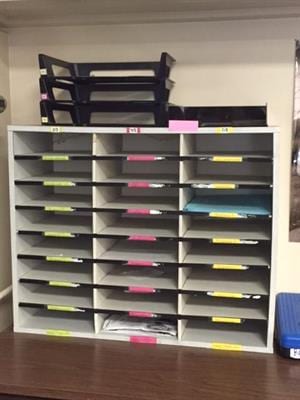
I teach three double-blocked class periods, so I have one “column” in the BGT for each class, with different tray labels for vocabulary, grammar, school forms/slips, absent/late work, tests, and then Assignments A through C for work that doesn’t fall under the other categories. I color-coded the labels to minimize students putting their work with the wrong class.
I honestly don’t know how I survived without the BGT. Gone are the days of huge, towering stacks of work around my classroom or 95 students asking every day, “Where do I put this?” Instead, they know already where to put it OR I simply post on the board where the assignment gets turned in. When it’s time to grade an assignment, I just collect the papers across the row of trays for that assignment in the BGT.
During my conference period, I sometimes collect anything in the Absent/Late Work tray and grade that. But sometimes I just spend my conference period spinning in my chair or watching videos of my kitten.
Just keeping it real, y’all.
2) Black Binder
Oh, Black Binder! How I love thee. Isn’t it beautiful?
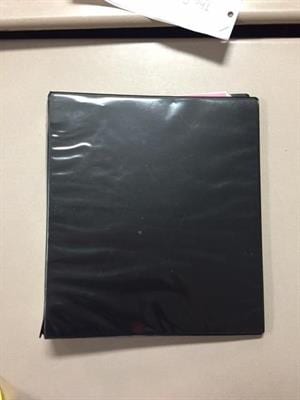
OK, so it’s pretty normal. If I were one of those teachers who are perfectly perfect, I would have some adorable and colorful label on the front that says my name and the year, but I’m not. It’s beautiful to me, OK?
Black Binder keeps track of every assignment for every student, but it’s a lot less work than it sounds. Here’s how it works.
First, let’s talk about the binder pages. I have one page per class, with every student listed in the order that their names appear in my online gradebook (this makes it easier to input grades later). Next to each student’s name, I have five columns for assignments with enough space for both a checkmark and an actual grade. When you make your page, just insert a table with the number of students you have as your rows and about six columns. Here’s a sample page with fictional names and fake assignments:
As you can see, Theon Greyjoy needs to get his act together.
If you save the template with student names and blank assignments, you can just print out this page each time you fill it up (it also makes it easier to add and delete students when they move).
Here’s how the binder works when kids turn in work. First, I set a hard deadline for an assignment (i.e., “Wednesday at the beginning of class before my timer goes off” or “Thursday before 3:45 after school”). As work gets turned in, I pull out the stack a couple of times and check off whose assignments I have on the left side of the column for that assignment. Then, the second the deadline has passed, I check for any additions to the stack of work. That way I can immediately hold students accountable and say, “Jon Snow, I’m missing your essay—I’ll pick you up from lunch to give you more time to work on it” instead of realizing his mistake at home when you’ve sat down to actually grade it. (I say this under the assumption that your school is like mine, where missing work is the teacher’s responsibility, not the student’s. Anyway. Moving right along.)
The BGT also cuts down the “I turned it in!” excuse. It’s kind of hard for a students to claim that you lost their papers when they watch you take it out of the stack right in front of them.
I’m telling you. Black Binder. It’s the real deal.
3) Posted directions for almost everything
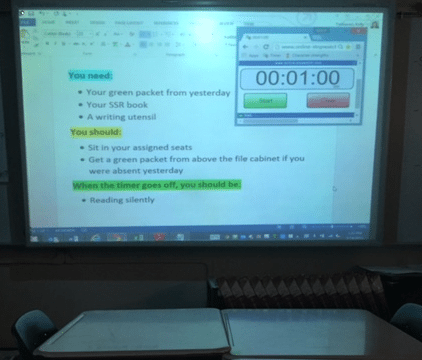
This is an excellent way to reduce the stress of repeating yourself and very easy if you have a projector of some kind. At the beginning of every class, I have a list of what students need and what they should be doing ready on the board (along with a timer of how long they have to do it).
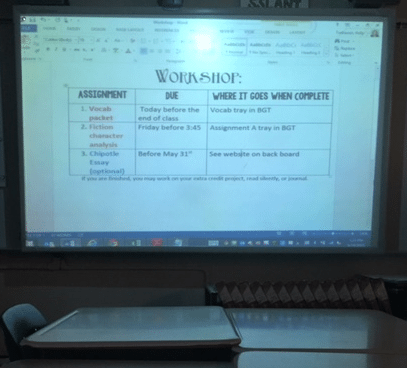
I also post instructions when my students are working on multiple assignments:
when they’re taking a test:
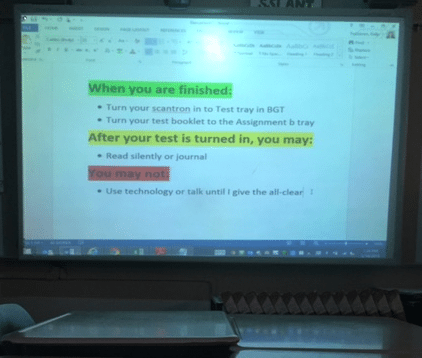
and other times they might need reminders. This cuts down on what is probably my biggest teaching pet peeve, which is hearing, “I’m done.” When instructions are posted, all you have to do is smile politely and point to the board. Students will get used to this, and pretty soon, “I’m done” will be a distant memory.
4) Hanging files for returning student work
Super easy! First, get yourself some hanging files. Give one to each student and have them write their names on the tab. Then file them in alphabetical order in these hanging file crates, which are stackable to save space. When you’re ready to pass back assignments, just grab that class’s box and file the assignments in the correct folder. I have my students check their files once a week.
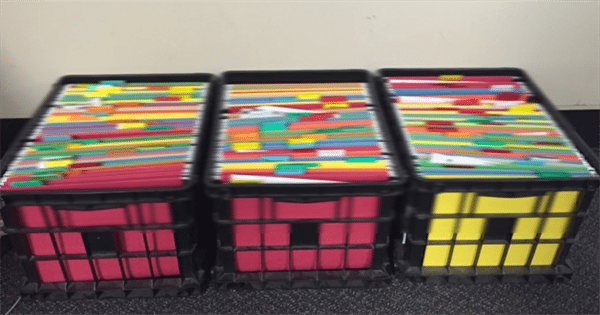
It took me way too long to figure out how to blur out my students’ names. Anyway.
Having student files cuts down on:
- Not knowing what to do when you’re passing back work and come across an absent student.
- Students feeling embarrassed or obligated to compare grades from work passed back at the same time.
- You tripping over 35 backpacks, gym bags, chair legs, real legs, etc., while trying to hand back work to each student.
5) Table bins for materials
For some reason, it took four years for me to learn that it’s better to put a few supplies at each table instead of putting all the supplies in one area. Having supplies at individual tables minimizes traffic, and at the end of class allows you to hold individual tables accountable for their messes instead of not knowing whom to address for a completely destroyed communal supply area.
Because I have only a few double-blocked periods, I have bins for each table AND for each class. It was expensive to buy 18 all at once, but I can’t tell you how well this has taken care of the “Someone stole my silent reading book/journal!” phenomenon.
6) Setting a timer for getting started after the bell/transitioning
This works well, but only if you use it consistently. I use a timer every day with my eighth graders at the beginning of class to show students how much time they have to be on task. If they don’t need any supplies other than a writing utensil, I give them about 30 seconds after the bell to be situated. If they need lots of supplies or have to move desks or something else that will take more time, I give them somewhere around the three-minute mark. The first week of school I let them get used to the timer, the second week I start giving out small consequences (for blatant violations, like the darling who chooses to talk to his friend about weekend plans for the first minute and 45 seconds, then scrambles to get ready in the last 15 seconds and fails). After the second week when they realize I’m for-real about the timer, I only have to remind my students a few times a year.
I also use the timer to transition between activities. Sometimes I use the actual timer on the board, and sometimes I turn to face a corner and say “I’m going to count out loud to 30 in Pig Latin and when I turn around, I need to see your desk in rows for testing. GO! Irty-thay … enty-nine tway …”
It might seem like using a timer is kind of militant (which is what I thought going into my first year when I didn’t use it), but I can assure you that my classroom is far from that. Using a timer lets our learning run smoothly with minimal interruptions, which means less wasted time, which means more time for extension activities and other fun stuff. Plus, who wants to be in a class where the first 10 minutes of every day is listening to the teacher plead for the class to get settled?
I just use a Google Chrome window with this link open as my timer, but there are many options online for you to choose from. It just needs to big enough for students to see even if they’re seated at the back of the room.
So, I know what you’re thinking: Most of these hacks require having supplies (bins, hanging files, a BGT, a projector, etc.), and chances are your principal hasn’t given you an American Express Black card* for school spending. I would first recommend asking around at your school to see if you can snag extras that may not be in use. If you’re still lacking, set up a project with Donors Choose and see if you can get it funded. If that doesn’t work, write a letter to your governor and attach a receipt for your supplies and ask if he/she will refund you because his/her budget cuts have made things difficult for you.
I hope at least one of these hacks will be helpful to you. What are YOUR top teaching hacks?
Looking for more support? Check out our Facebook page, exclusively for new teachers!
